Showing posts with label Garden. Show all posts

Monday, April 18, 2011

Garden Update

I have somehow managed to completely fail at blogging anything so far this year, and it's already April (how did that happen?) I guess I'm just too busy living life to write about it. Or maybe I'm just too busy working... My camera has also been a bit temperamental over the last few months, so I haven't taken as many photos as I wanted - completely missed taking a photo of the tomato bed in it's prime, which was a shame, it's not much to look at now. I'm just going to do a quick overview of the last few months, as I need to go to sleep soon for work tomorrow.

November - The vegetables are growing well and I was able to eat mesclun, spinach and pak choi. I've been eating juicy strawberries since the 8th November, they have been very productive this year and I'm glad I planted them in a bed instead of a strawberry pot (as I'd done the previous year).

Above is a box with mesclun, snow peas, beans, brocolli, pakchoi, carrots and spinach growing. The mesclun is bursting out of the square!

In November I also started laying weedmat around the boxes to keep down the grass and weeds, as I was getting a bit sick of mowing and strimming it away from the boxes. Here you can see potatoes, which I am growing in left over compost bags. I built a cage from chicken wire to protect my strawberry bed. The far bed in the above picture has broccoli, peas, and onions. It did have parsnips but they never germinated :( Think I had a bad batch of seeds.

Strawberries and raspberries - yum :)

December - I continued the weedmatting endeavour, and spent a day shovelling Otatara pebbles on top, with a lot of help from mum and my boyfriend. I think it looks almost stylish now!


The centre box has peas which you can see have shot up - they are Dwarf Massey peas which supposedly means they don't need staking, although I did give them a bit of support by making a cage around the box - primarily to protect my broccoli from cabbage butterflies and their caterpillars. I had a good, if short, harvest of peas - unfortunately the bulk of them were ready whilst I was away over Christmas and New Years. The fruit picking continues, and I've harvested my garlic (the pots in front of photo above), picking carrots when I want, and giant broccoli heads too.

January - Even though Summer seemed to have deserted us for most of the month, I at least still managed some great harvests. My experiment with cucumber fell flat though, with my cucumber plants promptly dying as soon as they went outside. Nevermind I have a solution for cucumbers for next season...
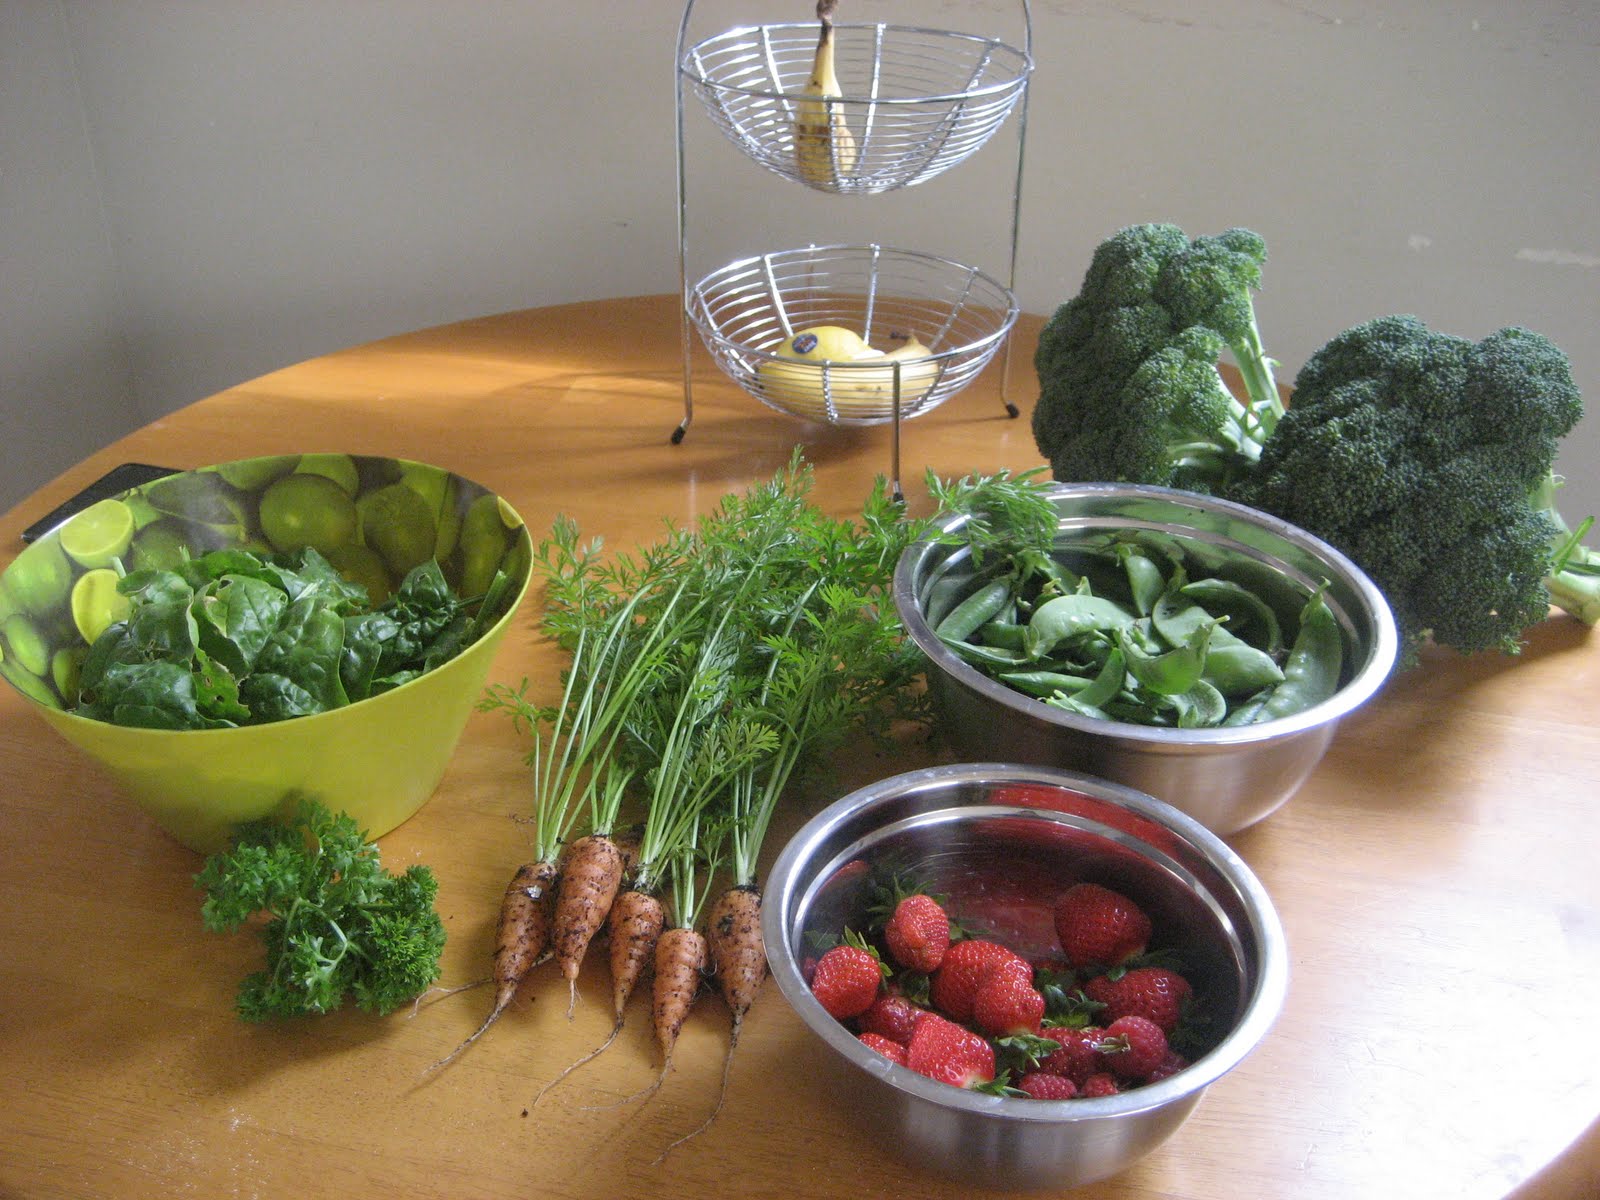
Carrots, strawberries, broccoli, peas, spinach... yum yum yum!

I also seem to be growing something surprising in my raspberry bed!

February - I came into my main crop of potatoes (I was hoping they'd be a bit earlier) and have spring onions and baby turnips too. My broccoli was almost done, and I ended up freezing a lot of later use as I just couldn't eat my way through it all.

March - This month has seen the bulk of my tomato crop ripen. They are in a raised bed by the back door and have done surprisingly well for being outdoors, although ripened later than I would have liked. Having said that, I did have some ripen before the next door neighbour's tomatoes, which are in a glasshouse. I have Roma, Moneymaker, Russian Red and Sweet 100 growing. I've made some into puree and frozen it. I love tomatoes, but there are just too many for me!

I also bought some fruit trees and planted them along the new fence my kind neighbour built as our new boundary. There are 2 ballerina apple trees, a meyer lemon and a feijoa so far. I've harvested all the potatoes from the bags I planted them in, and most of my crops are coming to the end of the season. It's also bulb planting time - I noticed last spring there was a severe lack of bulbs in my garden, so now there are tulips, daffodils, anemones, ranunculus, freesia, crocus and dutch iris.

April - The biggest accomplishment of April so far - my new tunnel house that Dad built me for my birthday!! Now I can plant even more food!

There are currently some pak choi, broccoli, silverbeet and lettuce growing in there. In summer I'll try for some cucumber again, and grow tomatoes so hopefully I will get some earlier. Unbelievably, considering how cold it has been recently, I'm still harvesting tomatoes, and strawberries. In fact I've had strawberries constantly since November, and haven't had to buy a single punnet.

At some point soon I'm going to write a post examining my successes and failures for the season and looking at where to go next. Right now, though, I have to go to sleep!

Friday, November 12, 2010

Filling the Square Foot Garden

So I was going to write about how I prepared my vegetable garden a while ago, but I have been too busy in my garden to actually get around to blogging about it! So I actually did this back in August, and it is working very well, but I'll update with new garden photos later. First off I want to explain about the mixture I used for the boxes. As I am using something called the 'Square Foot Method' I wanted to be fairly true to the book and follow the instructions to create a good growing medium. This involves using a formula of 1/3 blended compost, 1/3 vermiculite (a type of volcanic rock) and 1/3 peat moss. I was a bit sceptical about using peat moss as I remember the devastation of peat bogs in the UK, but peat moss in NZ is from sustainable places apparently so I felt a bit better about it. The vermiculite was difficult to source, but I eventually got it from a gardening supply place in Christchurch who happily couriered it down to me. For the compost, the book recommends using at least 5 different types, but this was pretty difficult, especially as many bagged composts don't actually state what is in them. I used Tui vege mix, Nicholls organic, Tui organic and worm castings. My boxes are 12" deep but I only needed to use the mix for the top 6" so the bottom half I just used plain compost of a different type again underneath.

My equipment - tarp, buckets, and compost, as well as the trusty book.


First I mixed up all the compost (I had already done lots of sums to work out how much of each compost I would need).

Then the peat and vermiculite were added and the whole thing was dampened and mixed some more.


Then I dragged the tarp over to my boxes and started shovelling it in with the bucket, wetting the mixture frequently which helps the compressed peat moss to expand.

I actually mixed it up for each box one by one, so did the whole thing 4 times. It got a lot easier...

All four boxes are filled up, and I had some left over as I have a box which is only half the size of the others - saved it for my next box. My flatmate and her entire extended family turned up while I was doing this... I'm pretty sure they thought I was completely crazy...

Then it was time to start planning and planting. I'll update with photos of my lovely growing garden shortly, it is doing very well.

Tuesday, September 7, 2010

Where oh where shall my garden go?

After building my garden boxes, it was time to position them. I'd chosen to put my garden along the side of the house as this side gets the most sun, even managing a good morning of sunshine in the darkest winter months, at least until the next door neighbour's trees obscure it. The sun is almost at the point of topping those trees now (beginning of spring) so it should be fine in the summer time. The bottom of the garden is the flattest part, with a slope up to another fairly flat level. For some reason, I decided to place my boxes in a diamond rather than square pattern... not sure why really but it seemed to make sense at the time! I think it makes the garden look interesting anyway, although it is perhaps not an efficient use of space...

I had a bit of help from my flatmate to remove some of the grass from the area I had marked out, although I went around afterwards and straightened it up a bit as his edges weren't that straight.


My lovely cut out square of ground.

I placed weed matting on the ground to stop any weeds from getting into my beds. I don't think that will be too much of a problem, the grass is dying just with me trampling all over it. The box fits over the top and nestles into the cut out square so it won't move too much.

The first two boxes fit snugly in the flattest bit of the garden.

Now came the dilemma of where to put the next box. The further up the garden, the less sunny it is, so I really wanted to keep it close to the first two. Unfortunately there is a bit of a slope in the way.

I decided that the slope wouldn't stop me, I could just dig the bed down into it. Easier said than done, it took me a lot of digging over an afternoon and following morning to get the bed vaguely level. It rained overnight as well, so I was slipping around in the mud a lot, but I think it helped to loosen the heavy clay soil somewhat.

I marked out the area with black tape and then started to dig.

Poppy lends a hand - put your back into it!

Almost finished.

The box goes into place.

This was incredibly hard to do on my own but I got there eventually after quite a bit of heavy work! It is still not quite level but was the best I could get it and I think it will be fine.

The three 4x4ft boxes finally in position.

I've protected them with bird netting, not because of birds but to stop the multitude of cats in my neighbourhood from using them as litter trays. Of course my cat is much better behaved! The grass and soil went behind the fence by the garage to raise that area a bit as I am going to make a pathway around to the side of the garage to make a composting area... don't think the neighbours will mind will they??

All the boxes in place and partially filled with compost. In the back is my 2x4 box which I have placed in an empty space in my old garden bed between two plants I uncovered from the mass of weeds that was originally there. I'll make sure to keep those bushes trimmed and away from my box. It will be planted with raspberry canes - if they fruit higher than the fence I can also go around the fence and pick them.

It was a lot of work to cut into the slope - but I will probably do it again for another 4x4 box at a later date. Either than or cut the whole slope out completely and put in a retaining wall. Tempting, but an awful lot of digging for me...

I also treated the wood with linseed oil to prolong the life of boxes. I will do another coat soon. If only it would stop raining!

Next - filling and planting the boxes!

Wednesday, August 18, 2010

Building a New Garden

One of my goals since being in my new house is to have a proper vegetable garden. Last year I grew quite a bit in containers, but this year I wanted to expand and make use of the space I had. After all, who needs all that grass to mow??

Last year I found a very interesting book in the library called Square Foot Gardening, by Mel Bartholomew. Unfortunately it always seems like it was booked out of the library when I wanted it again, so in the end I bought my own copy. I really liked some of the ideas in the book and decided that this year as an experiment I would follow Mel's method.

The main concept of the book is to garden in squares rather than traditional row gardening. Raised beds are used, and separated into square foot sections. NZ is a metric country, but I tend to work in both imperial and metric as I'm from the UK and I was taught both at school. Different numbers of plants can be grown in each square - for example you might grow one tomato plant in one square, but can grow 16 carrots in the same amount of space. The idea is that you plant what you need, when you need. Gone are the summers of my childhood when my dad's courgettes would all be ready at once and we would have a massive pile of them on the table to get through. Anyone wonder why I hate courgettes? That's why!

Mel's book had been around for several decades, but it was recently updated to include mixing up your growing media from scratch rather than improving your existing soil. This is great as my soil is pretty much all clay and I don't fancy my chances of growing much in it without some hard work! The bonus of starting from scratch is that you should be lessening the chance of weeds growing - and if they do get in there they are easy to spot and remove. I'll discuss the growing media in a separate post.

I decided that my raised beds would be best in the garden on the north side of my house, which gets all morning sun, and will get more afternoon soon in a few more weeks when the sun tops the neighbour's cabbage trees.

I had a few different ideas about the size of the raised beds I was going to make. Unfortunately as I only have my little car and no tow bar, I needed to get lengths of wood that would fit in the back of the car. Luckily the lovely guys at Placemakers cut up all my wood to the sizes I wanted, making it a lot easier for me! I originally intended to make 4 boxes, each 4x4ft. Later I decided on 3 this size, and one 2x4ft box, which meant I had to cut one piece of wood in half (well, luckily my flatmate did that for me!) However, I did all the box making by myself.

Beginnings of the box, a 4ft (120cm) long piece of timber, which will sit 30cms high. You can also see my electric drill/screwdriver, measure and other tools, along with my tulips and garlic that are growing in pots by the house.

To begin with I had to drill holes along one edge of each piece of wood for the screws.

Then it was a case of screwing each side together, I rotated all the corners so the box is equal length on all sides.

The finished box. I put extra pieces of wood in each corner to help stabilise the box. It is pretty heavy and it was quite hard work moving it when I was on my own, although my flatmate did help out a bit with moving the boxes to their place in the garden. I should note that the timber I used is untreated, as I wasn't keen on using chemically treated wood that might leech nasties into my vegetables. Later on I painted the outside of the box with linseed oil which is a good sealant. The boxes will probably rot in a few years, but the wood is fairly cheap and I don't mind having to replace them later on as I might have developed some new ideas by then!

I also made a 2x4ft box. In future I think I will stick to the 2x4 size as it was a lot easier for me to move around by myself. I have space in my garden for plenty more boxes, but I will see how I go with these ones first.

Wednesday, November 11, 2009

Yet another gardening post...

I figured it was time for a quick garden update again, as I think it has been making quite a bit of progress in the last few weeks. Everything seems to be developing nicely and I've even started harvesting some plants, particularly my rocket. I've made quite a few salads with my rocket leaves, and I'm starting to run out of plant! I've just sown some mesclun seeds so hopefully I'll have some more delicious salad leaves in a few weeks!

I decided to transplant my pak choi as I thought they were overcrowded in their previous container and merited a bucket each. I was wary about this as I read they don't like being transplanted, but they seem to be doing well, and aren't far off harvesting. The tomato plants are flourishing and flowering - I even found a baby tomato on the biggest plant:

My lettuces are also doing well, I've just been cutting off leaves when I want them and they just carry on growing in between my harvests! As you can imagine I've been having a lot of salads lately.

I've left the best bit until last - my strawberries! They are doing great in their planter (as is the mint I've just pruned and hung up sprigs to dry in the airing cupboard). There are quite a few strawberries developing, but these are the most advanced:

I've also sown some seeds! Some snow peas, cucumber, spring onions, spinach and mesclun. I've borrowed Daharja's idea for using egg boxes as seedling trays (though my dad also does this, and also cuts off the tops of plastic milk bottles for pots).

The mesclun was only sown a couple of days ago, and already it's beginning to sprout!

I've no idea why this picture keeps rotating when I upload it, and I can't seem to fix it sorry!

I'm thrilled at my current progress, gardening really is not as difficult as it may first seem. I'm not sure about how successful I'll be with my seeds yet, the hardest thing for me is to make sure they are kept watered, with my erratic work schedule I find it hard to remember sometimes. More updates soon!

Wednesday, October 21, 2009

Look how the garden grows...

It's been a few weeks since I transplanted the majority of my plants so I thought it would be time for an update. The garden is doing very well!

I've still been keeping them in the Sky Loft, although on nice days I've put the containers outside on the roof. I just have to be careful because it can get a bit windy up there.

Chives (from which I have already harvested), a Chilli plant which needs transplanting soon, and plenty of lettuce.

Another lettuce and some pak choi. I'm a little worried that the pak choi don't really have enough space, but I read that they don't like being transplanted too much, so I've decided it's probably better to leave them.

Strawberry plants and starting to flower! And some mint I stuck in the top of the container.

My sunflower, which seems to be growing visibly every day - I should start marking it on the stake. Come to think of it, if it grows much taller I'll need a taller stake!

My cherry tomato plants. The closest one I have named Alpha, because it seems to be twice as big as the others, a real super plant!

Last but not least, my rocket. I've just harvested some of this for my salad this evening, and it was scrumptious!

Well, that's it so far. I'm planning on sowing some seeds at some point. I should get onto that, but life has been pretty hectic at the moment. Suffice it to say I should be a proud (and broke) home owner in less than 2 months time!